

How To Repair Crack In Fiberglass Tub
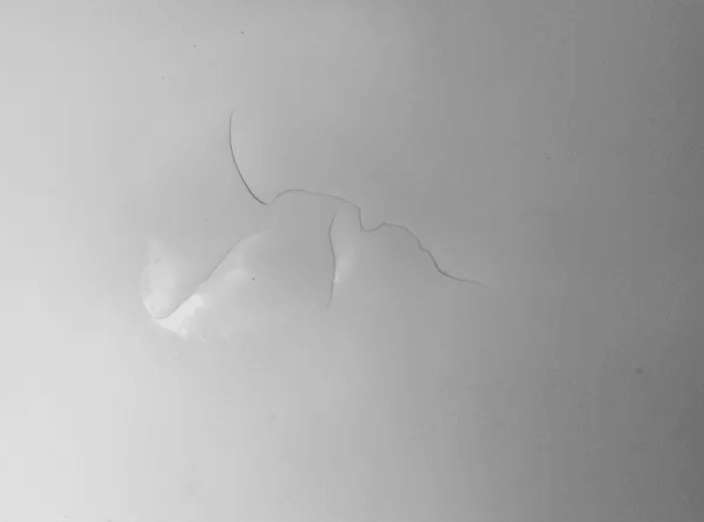
Hairline, spider, and stress cracks develop on fiberglass tubs due to frequent use, insufficient back up, utilise of harsh cleaners, dropping the tub, and hitting it with heavy objects. If non fixed on time, these small cracks develop into larger cracks which lead to leaks and eventually the bathtub breaks apart. Luckily, y'all can set hairline cracks on fiberglass tubs quite hands.
Make clean and dry the cracked area and then sand it with fine-grit sandpaper. Apply an agglutinative on the scissure followed past a fiberglass filler. Sand the surface area again and then apply an epoxy mixture followed past a piece of fiberglass wear. Apply more epoxy mixture and then a sealer to fix a hairline scissure in a fiberglass tub.
Both acrylic and fiberglass bathtubs are based on fiberglass and thus the procedure for fixing cracks on each is almost the same. You can thus apply the steps beneath to fix acrylic or fiberglass tubs or even shower pans fabricated of fiberglass.
How to gear up a crack in a fiberglass tub
To ready a crack in the bathtub, you lot demand a household cleaner, fine-grit sandpaper or emery cloth, pair of scissors, a cleaning sponge or rag, a dry lint-costless piece of cloth, a small paintbrush, and a fiberglass tub scissure repair kit. Brand sure there is enough ventilation and you accept rubber gloves on for this process.
Repair a crack in a fiberglass tub is as follows:
1. Clean and dry around the cleft
Use your household cleaner to clean the surface area around the crevice. Remove any dirt, mold, or other debris in and around the crack as much as possible. Utilise a sponge to scrub the area then rinse it with clean water.
After that, dry it upward with a lint-costless rag or piece of cloth.
2. Sand the area around the crack
Use the sandpaper or emery cloth to sand the area effectually the cleft to requite it a slightly rough texture. This makes it easy to add adhesives and other parts of the fiberglass tub repair kit.
In one case you've sanded the surface area to your satisfaction, brush away the dirt either with a brush or piece of habiliment.
3. Prepare and use the agglutinative
The fiberglass tub repair kit volition have an agglutinative or bonding agent with grooming instructions on information technology. Prepare it equally instructed then apply it to the crack and the sanded expanse effectually it using the included brush or a paintbrush of your own.
Make certain the adhesive covers at to the lowest degree an inch away from the crevice for the best results. Also, the adhesive should go deep inside the crack to saturate information technology as much as possible.
Expect for the adhesive to dry before the next step.
4. Make full the crevice with fiberglass filler
Afterwards the adhesive has dried upward, take the fiberglass filler from the fiberglass tub repair kit then use a putty knife to apply information technology and fill up the hairline crack on the tub with it. Remove any excess filler around the crack.
Look for the filler to dry out up.
5. Sand the area effectually the crevice again
Apply the sandpaper or emery cloth to sand the area effectually the crack until information technology'south level with the surrounding area then off the dirt when done. Don't overdo it as you lot will only be undoing the fiberglass tub fissure repair results.
6. Glaze the crack with epoxy
Read the instructions on the epoxy or polyester resin included in the fiberglass repair kit to create the required epoxy mixture.
Apply the epoxy mixture to the cleft and the surrounding area using a brush. The epoxy mixture should cover at least 2 inches away from the crack as well for the best results.
7. Add fiberglass clothing
Cut a piece of fiberglass clothing (found in the fiberglass repair kit) that fits the surface area covered by the epoxy mixture. Put the textile over the crevice before the epoxy mixture dries up. Printing information technology firmly into the epoxy mixture so run a putty knife over information technology to remove any air bubbles under the cloth.
8. Utilize more epoxy mixture
Utilize more of the epoxy mixture over and around the fiberglass clothing using the paintbrush. Apply a generous but reasonable coat of the epoxy mixture in this stage.
9. Utilise a sealer or finishing coat
The last procedure is to employ a sealer (also establish in the fiberglass repair kit) on the croaky area. The sealer protects the layers of materials used to seal the crack from damage by water and other substances.
In one case the sealer is dry, you lot're free to use your bathtub once again. You can add together a buffing compound to restore the sleeky terminate of your fiberglass bathtub before using it again. This procedure on how to patch a cleft in fiberglass tubs applies to all cracks in the bathtub including how to fix cracks in the lesser of the fiberglass bathtub and how to fix a cracked tub surround.
The video beneath gives a summary of this process:
Shower pans fabricated of fiberglass can too exist fixed with this process when they develop cracks. If the cracks in the shower pan are likewise deep, larn how to supervene upon the shower pan without removing tiles.
Fiberglass tub repair kit
A fiberglass tub repair kit has the tools and chemicals you need to fix a cracked or damaged fiberglass surface. Y'all can employ it on bathtubs and other fiberglass surfaces to fix the damaged areas.
A fiberglass tub repair kit has a fiberglass cloth, resin, castor, hardener, mixing tray, mixing stick, and a spreader.
In that location are two types of fiberglass tub repairs kits as follows:
1. Surface repair kit
The surface repair kit has a polymer-based paint or record for sealing the outer surfaces of cracks on fiberglass bathtubs.
2. Internal repair kit
The internal repair kit has a paste or glue used to fill up cracks from the within.
Your pick depends on the depth of the crack on your bathtub.
What causes a fiberglass tub to crack?
If yous're wondering why your bathtub is cracking, some of the causes of cracks in fiberglass tubs include the following:
1. Normal crumbling
Normal usage of the bathtub will lead to wear and tear. The surface of the tub will slowly wear out and make the tub thin enough for cracks to develop.
2. Bereft support
Fiberglass bathtubs can develop cracks when placed on uneven basis since the weight of the user won't be distributed evenly.
3. Apply of harsh cleaners
Some harsh cleaners such as bleach and acidic ones can slowly erode the surface of the fiberglass bathtub making information technology thinner and thus more vulnerable to cracking under pressure.
4. Dropping and hitting it with heavy objects
Bathtubs fissure due to existence impacted. In both cases, the bear on of the hits volition damage the surface of the bathtub and crave proper fixing. With fiberglass being among the lightest types of bathtubs, it'due south like shooting fish in a barrel to comport information technology effectually hence a higher take chances of dropping it.
The depth of the crack determines whether you should fix it past yourself or not. If it'due south only on the surface, you can do information technology by yourself. If the scissure goes all the way to the other side of the bathtub, you need a plumber for that.
Plumbers oftentimes charge from $80 to repair bathtub cracks which is costlier than the price of fiberglass repair kits (about $l). Even so, plumbers know how to patch a fiberglass tub better given their skills and feel.
Will Flex Seal fix a cracked bathtub?
Flex Seal does non fix a croaky bathtub since it has no structural value. While Flex Seal tin can stop a leak, it cannot fix a scissure as the cleft continues growing underneath the layer of Flex Seal.
How to prevent cracks in fiberglass tub
You can foreclose cracks in tubs by doing the following:
- Ensure the bathtub is properly supported and placed on fifty-fifty footing.
- Avoid cleaning the tub with harsh cleaners. Instead, use the recommended cleaners or even balmy household cleaners.
- Avoid dropping the bathtub on the floor or striking it with heavy objects.
- Rinse it after every employ to preclude harsh chemicals from building up on the surface of the tub.
- If the bathtub already has a crack, drill small terminate-drill holes ¼ inches deep at the ends of the cracks to stop the cracks from extending further then fix it as shown above.
Generally, protect the bathtub from whatsoever form of abuse and yous'll rarely see cracks on it. If it has developed too many cracks, take it refinished to restore its looks and integrity.
Source: https://highshower.com/crack-in-fiberglass-tub/
0 Response to "How To Repair Crack In Fiberglass Tub"
Post a Comment